11 Secrets to Stunning Zoo Photography
This is taken directly from my other website, Flarecorp Media, where I produce YouTube Videos for content creators. I liked the information so much though that I wanted to post it here since this is my website focused on my photography.
How to Take Stunning Wildlife Photos at the Zoo
Learn how to improve your photography for your next trip to the zoo!
Welcome to another Flarecorp Media camera adventure! Today, we're exploring the Omaha Henry Doorly Zoo to learn how to capture wildlife photos that look like they were taken in the wild. Whether you’re a seasoned photographer or just starting, these tips will help you get the best shots possible.
Get this advice in video form!
Why the Zoo?
Finding wild animals can be challenging, especially in certain parts of the United States like Nebraska, where the most exciting wildlife are deer and birds. Without access to larger critters, practicing at the zoo can be a great way to hone your skills.
Tips for Capturing Wild-Looking Photos:
1. Visit on an Overcast Day:
Cloudy days provide great lighting without harsh shadows, making it easier to capture well-lit photos.
On an overcast day, you have nice, even light and don't have to worry about harsh lights and shadows. This photograph was taken under some foliage that normally would cause mottled lighting due to the shadows of the leaves.
2. Visit on a Cool Day:
Cool weather keeps the animals more active and engaged, giving you more opportunities to capture dynamic shots.
Cooler weather keeps both you and the animals comfortable, increasing their activity levels.
Many mammals, especially big cats, spend most of their day snoozing and trying to stay cool. Visiting on a cooler day will give you a better chance of seeing them out in the open.
3. Get Eye-Level with the Animals:
(The Best Advice I Can Give You!)
Squat or kneel to match the animals' eye level. This perspective makes your photos more engaging and natural.
Walking around the exhibit can also help you find a better eye-level angle.
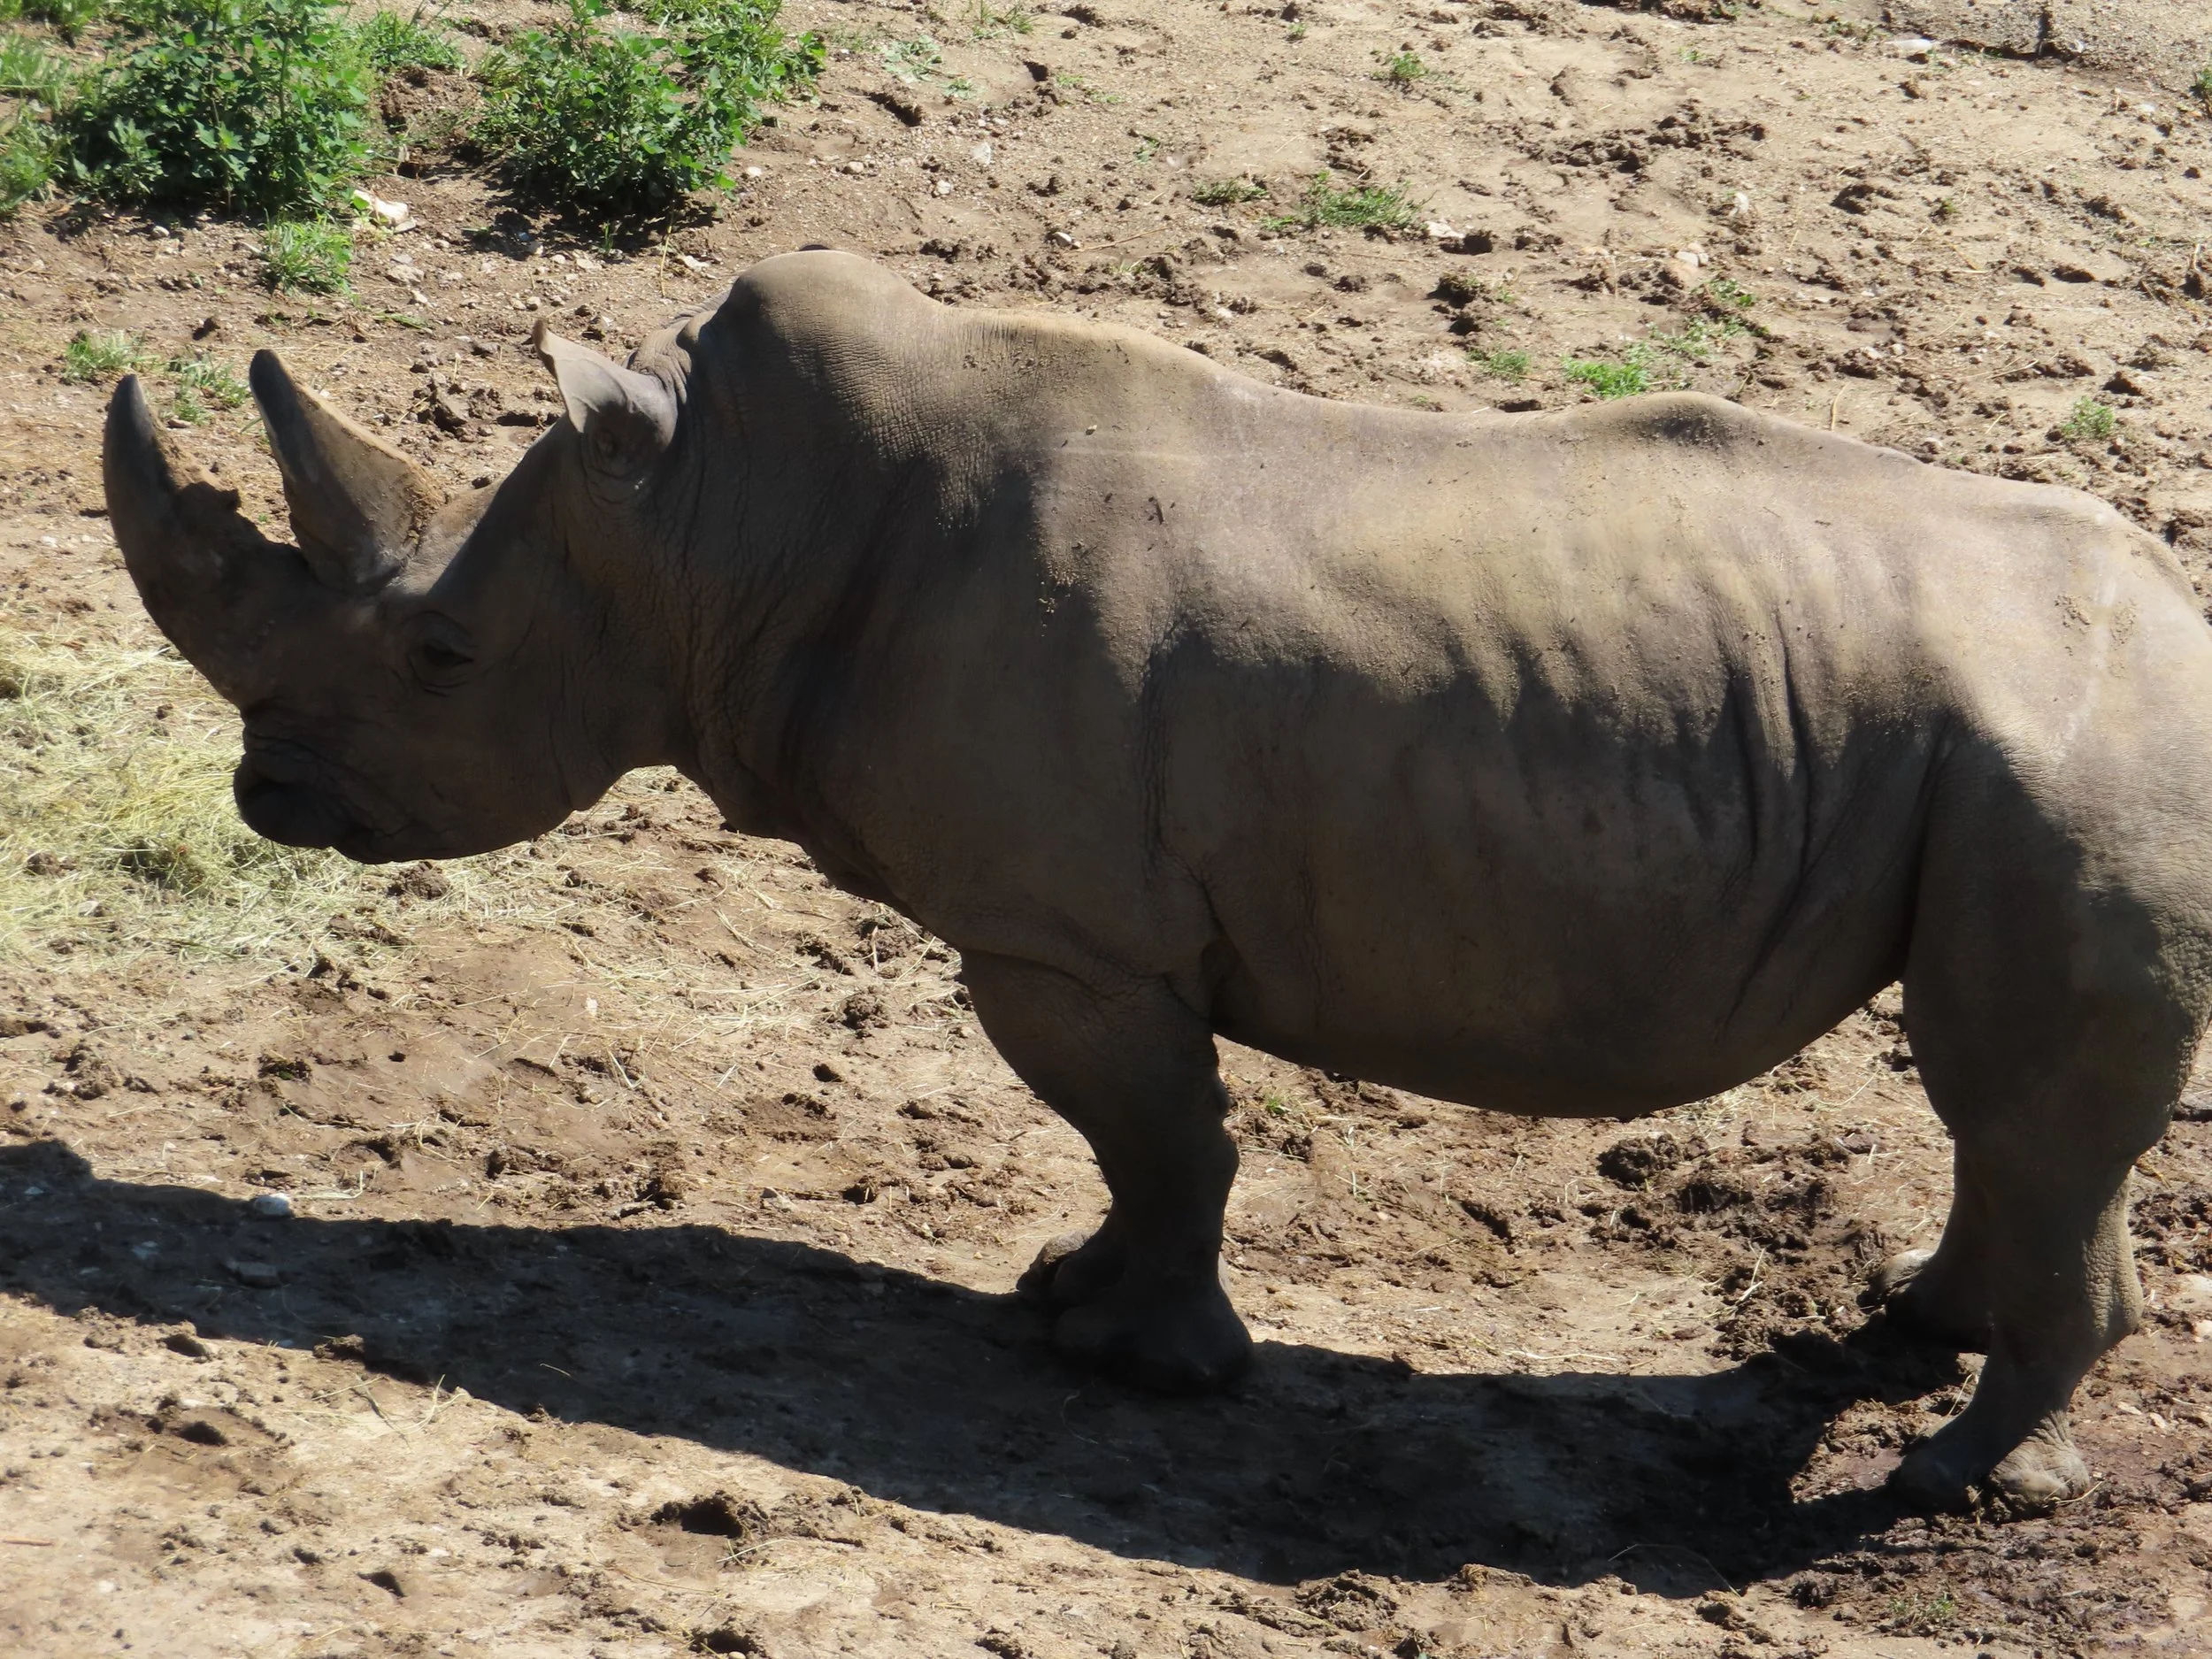
Looking down on this rhino puts the viewer into an observer mindset. They are just looking at an animal from a vantage point.
Compare it with this where the camera is at eye level. The viewer feels like they are staring down this large, threatening animal in person.
4. Look at Backgrounds:
(The Second Best Advice I Can Give You!)
Always check what’s behind your subject. Avoid fences, enclosures, and other man-made objects for a more authentic look.
Move around to find the best angles that isolate the animal from distracting backgrounds.
The giraffe on the left has a more natural and clean background than the one on the right with its train tracks and buildings. I spent my time photographing the one on the left. (See result below)
5. Photograph Animals Away from Fences:
Capture animals when they are far from the enclosure fences. This creates more separation and blurs the background, enhancing the natural feel.
Photograph the animals far from their back fences. That way they can be blurred by the lens or more easily erased in post processing. This image had 2 fence posts and electric wire behind the giraffe. The wire is hidden by the depth of field blur and the fence posts were easily cloned out using photoshop.
6. Find Out When Animals Are Most Active:
Different animals are active at different times. Ask zookeepers or observe the animals to determine the best times for photography.
I took this during the cheetah's most active time when it was pacing around its enclosure, stretching its legs.
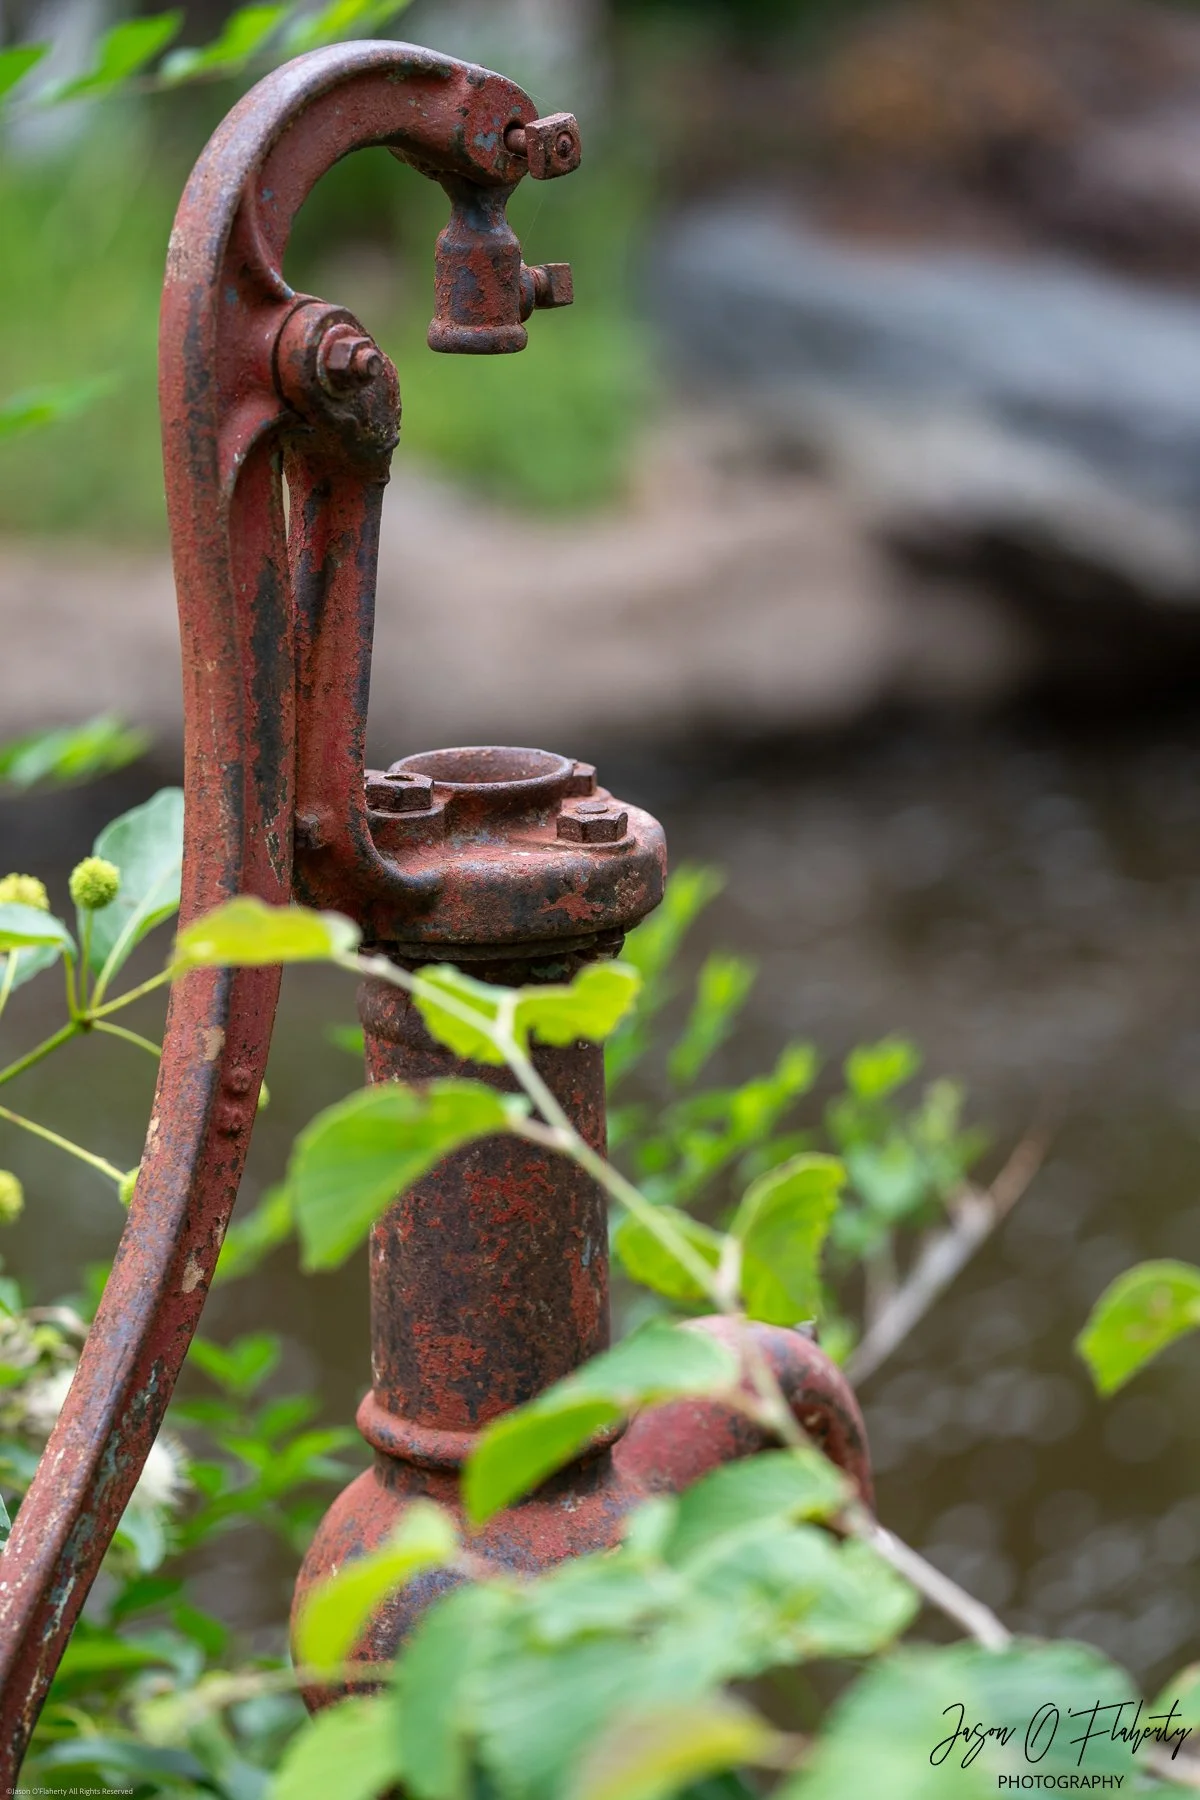
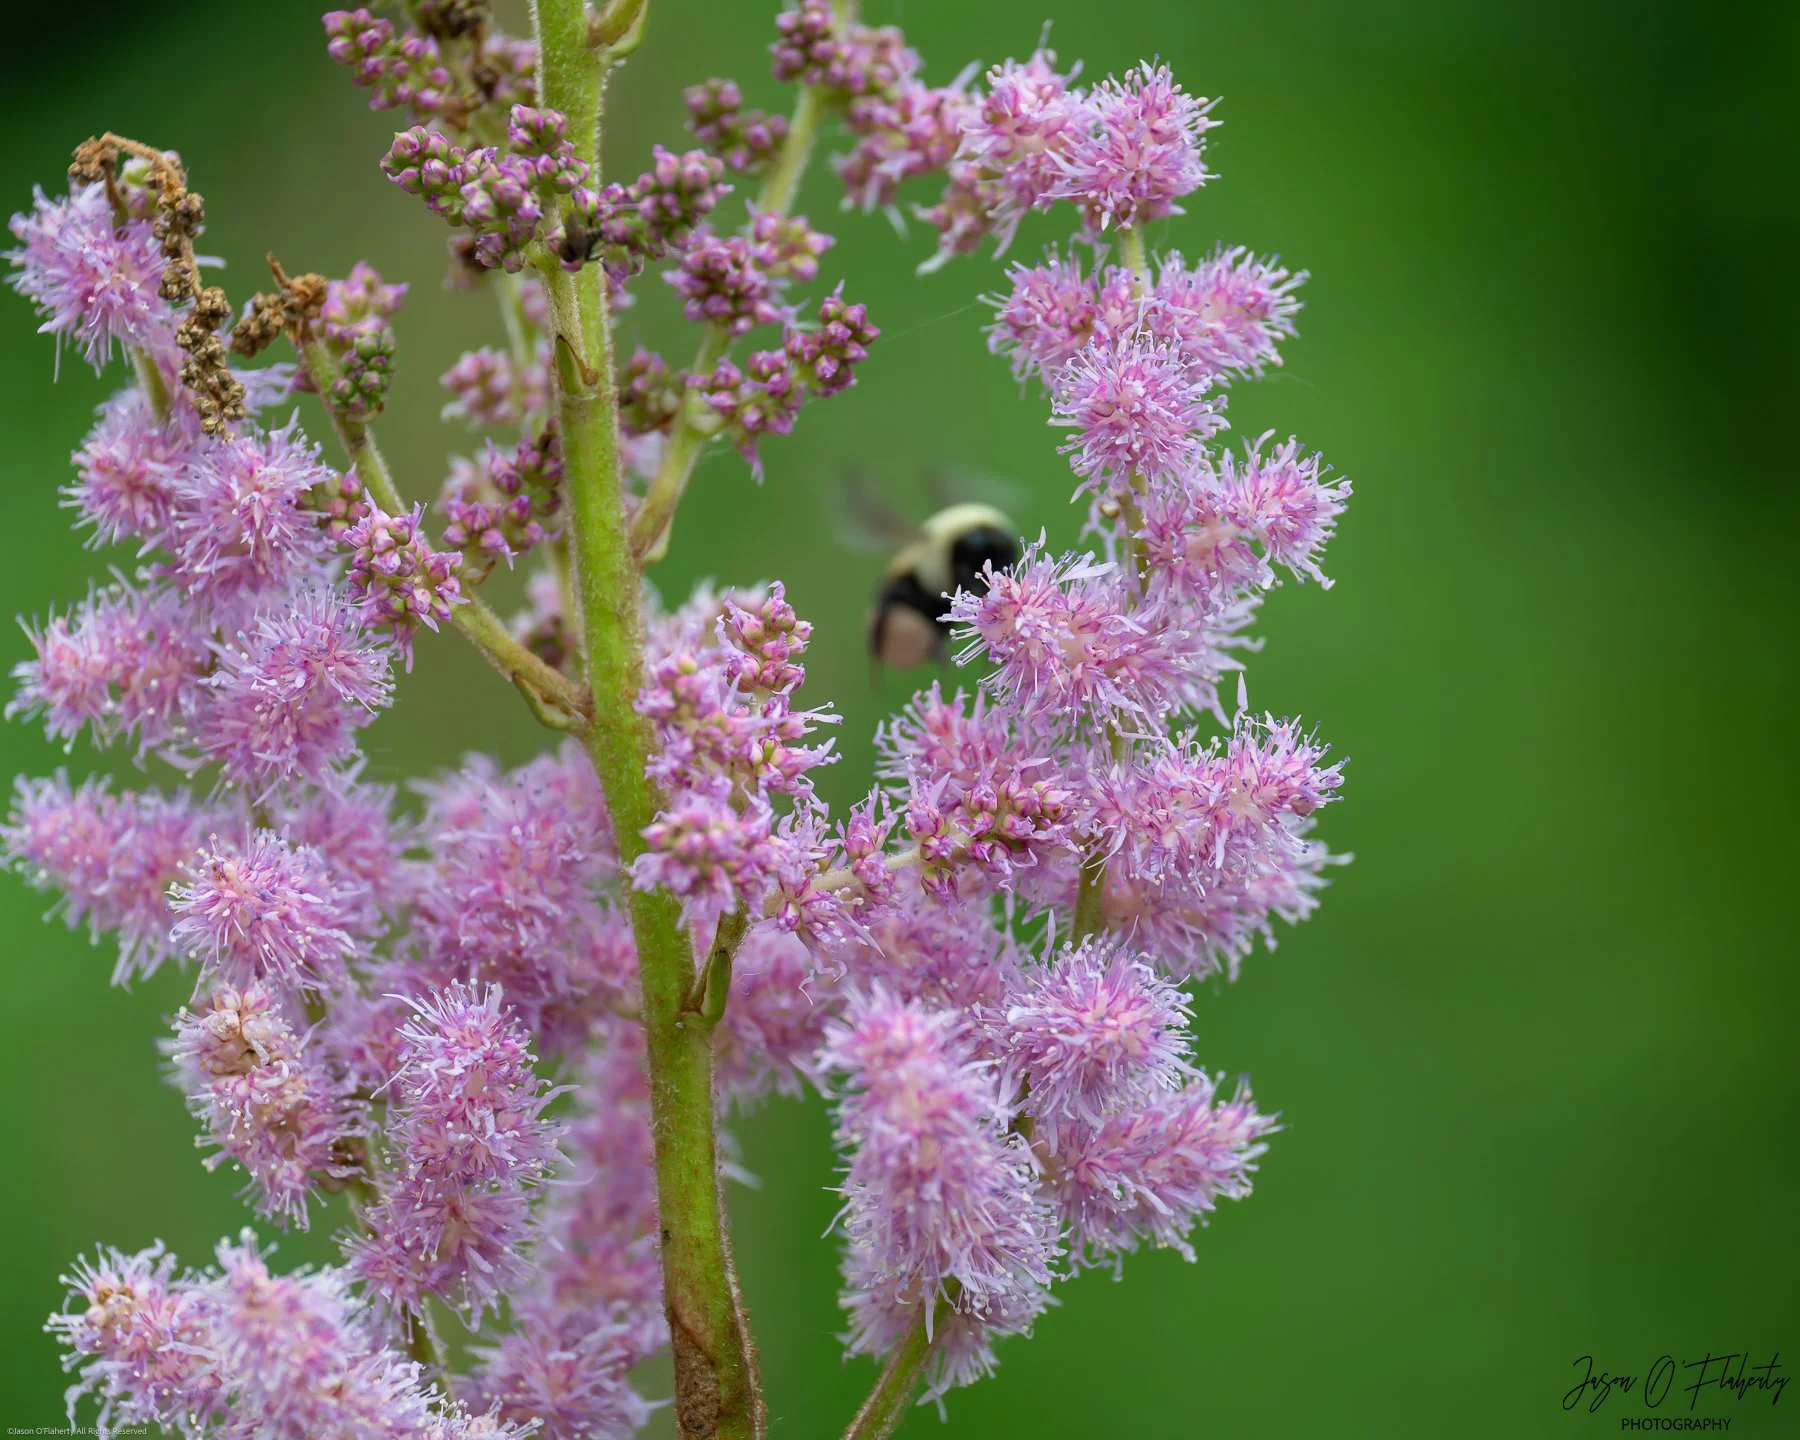
7. Photograph Non-Animals:
Zoos often have beautiful landscapes, plants, and structures. Don’t miss out on these opportunities to diversify your portfolio.
Many zoos have beautiful plants as well as animals. Have a look around!
This waterspout reminds me of a seahorse. What do you think?
8. Select the Better Subject:
When choosing a subject, opt for animals without tags or visible man-made objects around them. This makes your photos look more natural.
Since Zoos take in previously owned and injured animals, avoid the ones tags or injuries to get a more natural looking subject. The Sable antelope on the right doesn't have an ear tag, making them a better choice.
9. Try Long Focal Lengths to See Through Fences:
Use a long focal length to blur the fences and focus on the animals. This technique can make the fences almost invisible in your shots.
A good range of focal lengths is crucial. A 100-400mm lens works well for distant animals, while a 24-120mm lens is great for closer subjects.
Fast lenses with wide apertures (f/2.8 or lower) provide better separation between the subject and the background.

This was filmed with a 400mm lens. I was able to focus right through the fence onto the tiger
10. Dress Like a Zookeeper:
Dress in similar colors to the zookeepers. Animals are more likely to approach you if they think you're familiar.
I searched the internet for photos of Zookeepers at this zoo and did my best to match. I've had gorillas, giraffes, and macaws go out of there way to visit me because they thought I was someone they might know.
11. Shoot at Angles to Reduce Glares:
When shooting through glass, avoid glares by shooting at an angle and ensuring the subject is far from the glass.
The glass between me and this gorilla was at about 45° which kept my reflection out of the shot and reduced the glare from lights
Conclusion
Treat your zoo photography outing just like a wildlife photography session. Consider the weather, animal behavior, and composition to create stunning images that don’t look like they were taken at a zoo. If you enjoyed these tips, please support my channel on Patreon or become a YouTube member for exclusive behind-the-scenes content.
For more photography tips, check out my tutorial on how to photograph waterfalls. Keep doing what you love, and happy shooting!
Learn how to take a photograph like this. Click Here